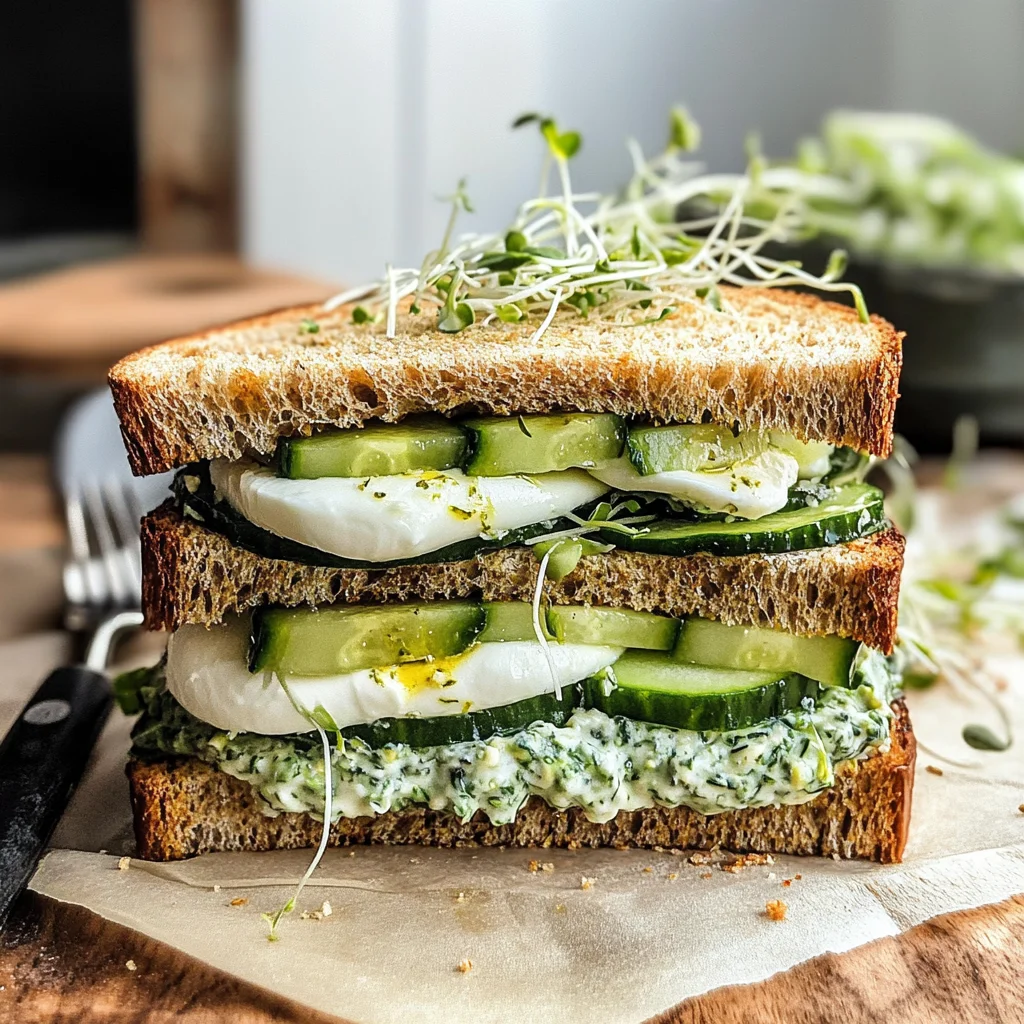
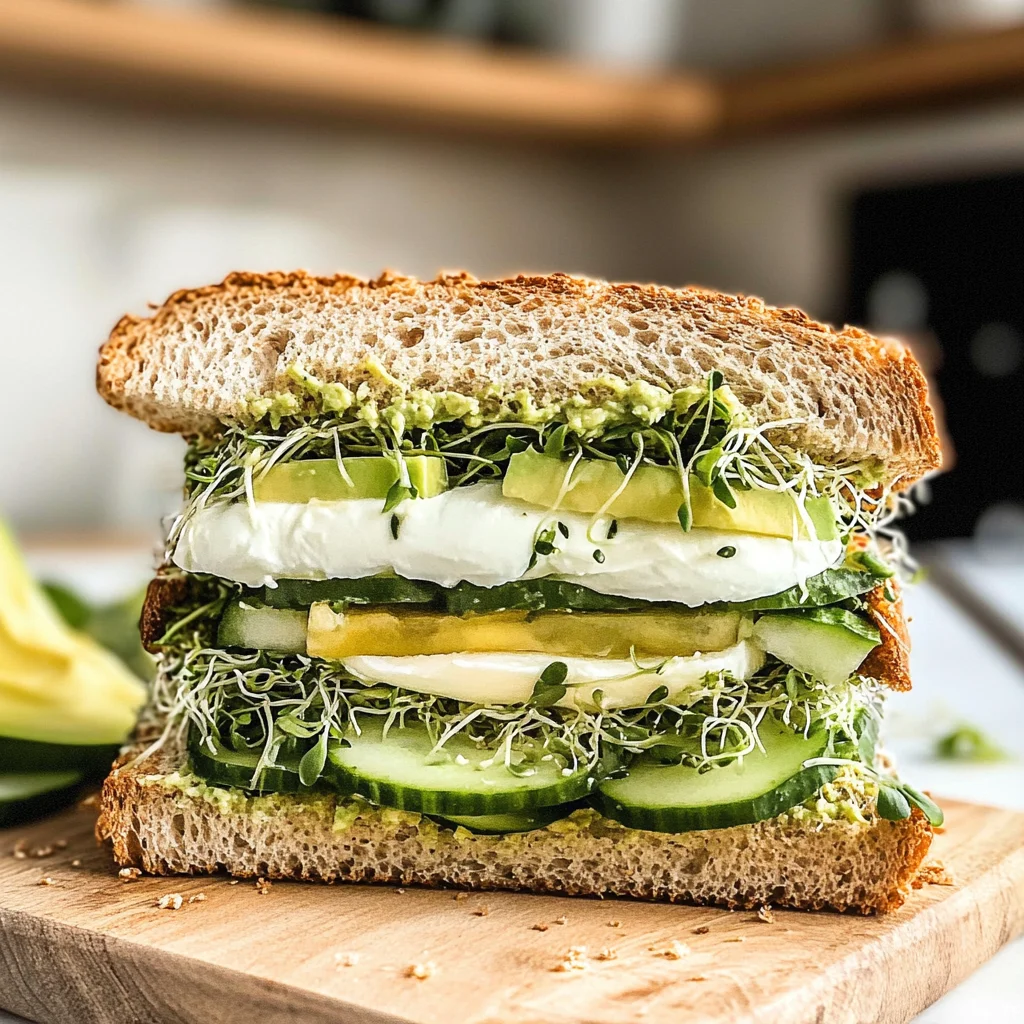
This Green Goddess Sandwich is a delightful and vibrant option for those craving a fresh and healthy bite. With a creamy herb sauce, crisp veggies, and creamy avocado layered between hearty whole-wheat bread, it’s perfect for any occasion. Whether you’re enjoying a quick lunch, preparing for a picnic, or seeking a no-cook dinner option, this sandwich offers both taste and nutrition.
Why You’ll Love This Recipe
- Quick and Easy: This sandwich comes together in just 10 minutes, making it an excellent choice for busy days.
- Flavorful: The creamy herb-packed sauce elevates the taste of fresh ingredients, ensuring every bite is bursting with flavor.
- Versatile: You can customize the veggies based on your preferences or what you have on hand.
- Nutritious: Packed with fresh vegetables and healthy fats from avocado, this sandwich is as good for you as it is delicious.
- Vegetarian-Friendly: It’s a great option for vegetarians seeking a filling meal without meat.
Tools and Preparation
Preparing the Green Goddess Sandwich requires minimal tools. Gathering the right tools will make the process even smoother.
Essential Tools and Equipment
- Mixing bowl
- Whisk
- Knife
- Cutting board
- Spatula
Importance of Each Tool
- Mixing bowl: Essential for combining all the sauce ingredients smoothly.
- Whisk: Helps to thoroughly mix the yogurt and mayonnaise, ensuring a creamy texture without lumps.
- Knife: Needed for slicing vegetables evenly and preparing the sandwich components.
- Cutting board: Provides a sturdy surface for chopping veggies safely.
Ingredients
To create this delicious Green Goddess Sandwich, you’ll need the following ingredients:
For the Sauce
- ¼ cup Greek yogurt
- ¼ cup mayonnaise
- 1 clove garlic, grated or pressed
- 3 tablespoons fresh chives, finely chopped
- 3 tablespoons tarragon, finely chopped
- zest and juice of ½ lemon
- 1 tablespoon olive oil
- ¼ teaspoon salt
- ¼ teaspoon ground black pepper
For the Sandwich
- 4 thick slices whole-wheat bread (1/2 inch)
- 1 cup arugula (or watercress)
- 6 ounces fresh mozzarella cheese, sliced ¼ inch thick
- 1/3 English cucumber, thinly sliced
- 1 medium avocado, sliced
- 2/3 cup alfalfa sprouts
How to Make Green Goddess Sandwich
Step 1: Prepare the Sauce
In a small mixing bowl, add the Greek yogurt, mayonnaise, grated garlic, chives, tarragon, lemon zest and juice, olive oil, salt, and pepper. Whisk to combine until smooth.
Step 2: Assemble the Sandwich
Spread 2 tablespoons of the yogurt-mayo sauce on each slice of whole-wheat bread.
Step 3: Layer Your Ingredients
On two of the bread slices with sauce spread on them:
1. Top each slice with half of the arugula.
2. Add mozzarella slices evenly on top.
3. Layer thinly sliced cucumber over the cheese.
4. Place slices of avocado next.
5. Divide alfalfa sprouts among both slices as well.
Step 4: Close Your Sandwich
Take the remaining two slices of bread (sauce side down) and place them on top to close each sandwich.
Step 5: Serve
Cut each sandwich in half diagonally and serve immediately for best flavor!
How to Serve Green Goddess Sandwich
This Green Goddess Sandwich is not only delicious but also versatile in its presentation. You can serve it in various ways to enhance your dining experience.
Classic Presentation
- Use a simple plate to serve the sandwiches cut in half. This allows for easy sharing and showcases the vibrant colors of the fillings.
Picnic Style
- Wrap each sandwich individually in parchment paper or foil. This keeps them fresh and makes for an appealing picnic spread.
With a Side Salad
- Pair the sandwich with a light side salad, such as a mixed greens salad dressed with lemon vinaigrette. The freshness complements the sandwich perfectly.
On a Platter
- Arrange multiple sandwiches on a large platter for gatherings. Add some cherry tomatoes and olives for color and variety.
Toasted Option
- For a warm twist, grill the assembled sandwiches on a pan until golden brown. This adds a delightful crunch and warmth to each bite.
How to Perfect Green Goddess Sandwich
Creating the perfect Green Goddess Sandwich requires attention to detail. Here are some tips to elevate your sandwich-making skills.
-
Choose Fresh Ingredients: Always opt for fresh vegetables and herbs. They enhance flavor and texture, making your sandwich more enjoyable.
-
Balance Flavors: Adjust the seasoning of your sauce according to taste. A pinch more salt or lemon juice can elevate the overall flavor profile.
-
Layer Wisely: When assembling, layer ingredients thoughtfully. Start with sturdier items like mozzarella at the bottom, followed by softer layers like avocado.
-
Make Ahead: Prepare the yogurt-mayo sauce in advance and store it in the fridge. This allows flavors to meld together beautifully over time.
-
Experiment: Feel free to add other veggies like roasted red peppers or sprouts for added flavor and nutrition.
Best Side Dishes for Green Goddess Sandwich
Pairing your Green Goddess Sandwich with complementary side dishes can create a well-rounded meal. Here are some excellent options:
-
Chips: Pair with kettle-cooked potato chips for a crunchy contrast that balances the creamy sandwich.
-
Fruit Salad: A bowl of mixed seasonal fruits adds refreshing sweetness that complements savory flavors.
-
Vegetable Sticks: Carrot, celery, or bell pepper sticks served with hummus make for a healthy side that’s easy to prepare.
-
Pickle Platter: Offer an assortment of pickles or pickled vegetables for tangy bites that enhance your meal.
-
Coleslaw: A light coleslaw provides crunch and creaminess, making it an excellent match for your sandwich.
-
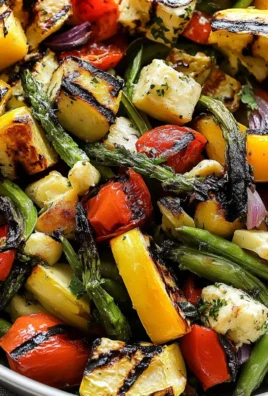
Grilled Corn on the Cob: Sweet grilled corn brushed with herb butter pairs perfectly with this fresh sandwich.
-
Quinoa Salad: A chilled quinoa salad full of veggies offers added protein and texture that complements every bite.
-
Roasted Potatoes: Crispy roasted potatoes seasoned with herbs create a hearty side that rounds out your meal beautifully.
Common Mistakes to Avoid
Making the perfect Green Goddess Sandwich can be simple, but there are a few common mistakes to watch out for.
- Skipping the sauce: The creamy herb sauce is essential for flavor. Don’t skip it; ensure you mix it well.
- Overstuffing the sandwich: While it’s tempting to add more veggies, overstuffing can make it hard to eat. Stick to the suggested amounts for balance.
- Using stale bread: Fresh bread enhances texture and flavor. Always use fresh whole-wheat bread for the best results.
- Forgetting seasoning: Seasoning adds depth to your sandwich. Ensure you add salt and pepper to your sauce for that extra kick.
- Neglecting presentation: A well-assembled sandwich is visually appealing. Take time to layer ingredients neatly for a gourmet look.
Storage & Reheating Instructions
Refrigerator Storage
- Store in an airtight container.
- Best consumed within 1-2 days for optimal freshness.
Freezing Green Goddess Sandwich
- Freezing is not recommended as it may affect the texture of the ingredients, especially the avocado and mozzarella.
Reheating Green Goddess Sandwich
- Oven: Preheat to 350°F (175°C) and heat for about 10 minutes until warm and crispy.
- Microwave: Heat on medium power for 30 seconds to 1 minute, but be aware this may soften the bread.
- Stovetop: Place in a skillet over low heat, cover, and warm for about 5 minutes on each side until heated through.
Frequently Asked Questions
Here are some frequently asked questions regarding the Green Goddess Sandwich.
What is a Green Goddess Sandwich?
A Green Goddess Sandwich features creamy herb sauce, fresh vegetables, and mozzarella cheese layered between slices of whole-wheat bread. It’s a delicious vegetarian option packed with flavor.
Can I customize my Green Goddess Sandwich?
Absolutely! You can add other veggies like bell peppers or swap mozzarella for another cheese if desired.
How many servings does this recipe yield?
This recipe yields 2 servings, providing two delightful sandwiches perfect for lunch or a light dinner.
What can I serve with my Green Goddess Sandwich?
Pair your sandwich with a side salad or some fresh fruit for a balanced meal that’s both satisfying and refreshing.
How long does it take to prepare this sandwich?
The prep time is quick—only about 10 minutes—making it an ideal choice for busy days when you want something healthy without much hassle.
Final Thoughts
The Green Goddess Sandwich is not only vibrant and delicious but also incredibly versatile. You can easily customize it with your favorite vegetables or add different cheeses to suit your taste. Give this recipe a try; it’s a fantastic option for lunches or light dinners that will leave you feeling refreshed!
Green Goddess Sandwich
Indulge in the delightful freshness of a Green Goddess Sandwich, a vibrant and nutritious meal option that brings together creamy herb sauce, crisp vegetables, and smooth avocado, all nestled between hearty whole-wheat bread. This sandwich is perfect for any occasion—be it a quick lunch on busy days, a picnic treat, or a no-cook dinner. In just 10 minutes, you can enjoy a satisfying bite that not only tastes amazing but is also packed with wholesome goodness. Customize the veggies based on your preferences and savor every flavorful layer!
- Prep Time: 10 minutes
- Cook Time: 0 minutes
- Total Time: 10 minutes
- Yield: 2 servings 1x
- Category: Lunch
- Method: No-Cook
- Cuisine: American
Ingredients
- ¼ cup Greek yogurt
- ¼ cup mayonnaise
- 1 clove garlic, grated or pressed
- 3 tablespoons fresh chives, finely chopped
- 3 tablespoons tarragon, finely chopped
- zest and juice of ½ lemon
- 1 tablespoon olive oil
- ¼ teaspoon salt
- ¼ teaspoon ground black pepper
- 4 thick slices whole-wheat bread (1/2 inch)
- 1 cup arugula (or watercress)
- 6 ounces fresh mozzarella cheese, sliced ¼ inch thick
- 1/3 English cucumber, thinly sliced
- 1 medium avocado, sliced
- 2/3 cup alfalfa sprouts
Instructions
- In a mixing bowl, combine Greek yogurt, mayonnaise, grated garlic, chives, tarragon, lemon zest and juice, olive oil, salt, and pepper. Whisk until smooth.
- Spread 2 tablespoons of the sauce onto each slice of whole-wheat bread.
- Layer half of the arugula on two slices of bread. Top with mozzarella slices, cucumber slices, avocado slices, and alfalfa sprouts.
- Close each sandwich with remaining bread slices (sauce side down).
- Cut sandwiches in half diagonally and serve immediately.
Nutrition
- Serving Size: 1 sandwich
- Calories: 480
- Sugar: 5g
- Sodium: 600mg
- Fat: 25g
- Saturated Fat: 5g
- Unsaturated Fat: 20g
- Trans Fat: 0g
- Carbohydrates: 45g
- Fiber: 10g
- Protein: 16g
- Cholesterol: 20mg

Leave a Comment