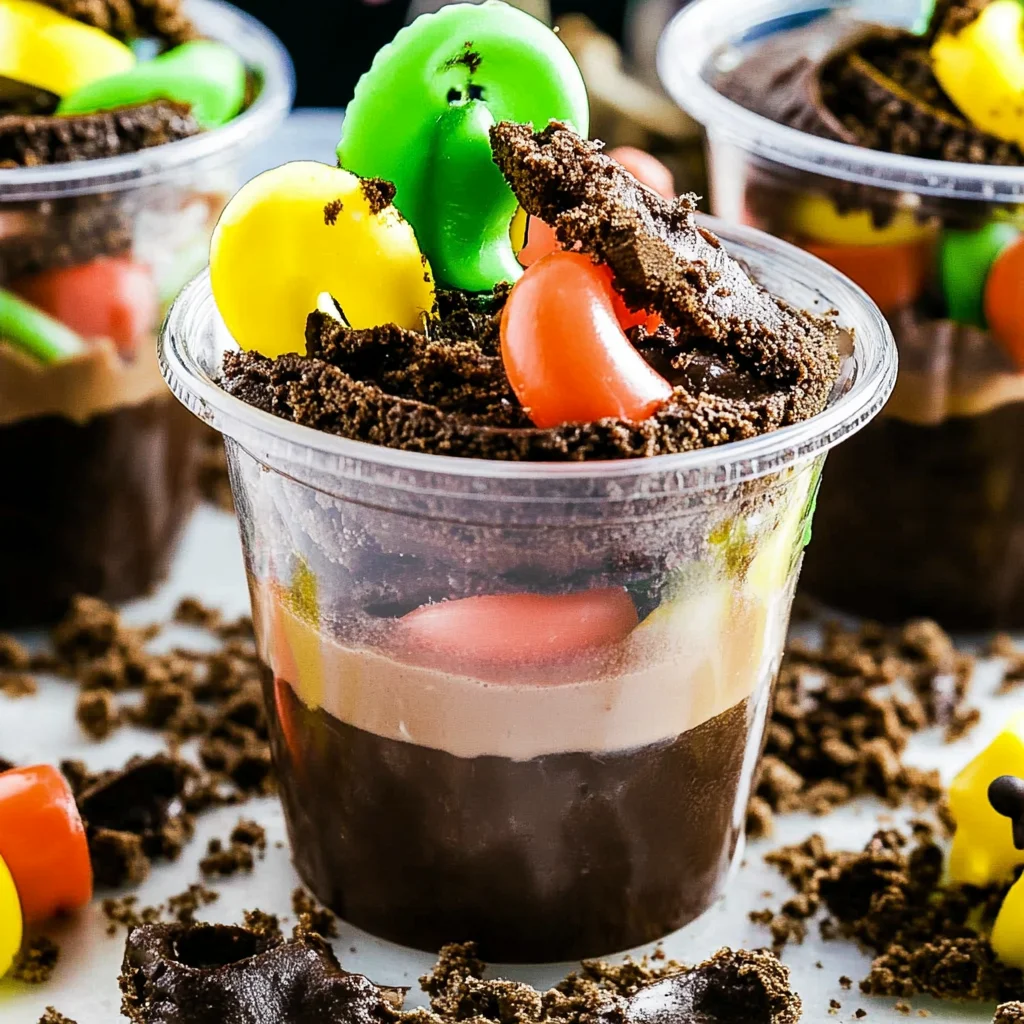
Layers of chocolate pudding, crushed Oreos, and gummy worms come together to create Dirt Cups, a delightful dessert perfect for any occasion. Whether you’re celebrating a birthday, Halloween, or just want a fun treat for your family, these cups are sure to bring smiles. The combination of creamy chocolate pudding and crunchy Oreos topped with playful gummy worms makes this dessert as fun to eat as it is to make!
Why You’ll Love This Recipe
- Easy to Prepare: With just a few ingredients and simple steps, you can whip up these delicious Dirt Cups in no time.
- Kid-Friendly Fun: Kids love the idea of eating dirt, making it an exciting treat for parties or family gatherings.
- Customizable Layers: Feel free to mix in your favorite candies or toppings for a personal touch that everyone will enjoy.
- Perfect for Any Occasion: Whether it’s a birthday party or a casual get-together, Dirt Cups fit right in with any celebration.
Tools and Preparation
Before diving into the recipe, gather your tools. Having everything ready will make the preparation smoother and more enjoyable.
Essential Tools and Equipment
- Mixing bowl
- Whisk
- Serving cups or glasses
- Spoon
Importance of Each Tool
- Mixing bowl: This is essential for combining the pudding mix with milk effectively.
- Whisk: A whisk helps achieve a smooth texture in your pudding without lumps.
Ingredients
Layers of chocolate pudding, crushed Oreos topped with gummy worms!
For the Pudding
- 3.4 ounces box instant chocolate pudding mix
- 2 cups milk
- 8 ounces whipped topping (thawed)
For the Topping
- 10-12 Oreo cookies (crushed)
- 32 gummy worms
How to Make Dirt Cups
Step 1: Prepare the Pudding Mixture
In a medium bowl, add cold milk and sprinkle pudding over top. Whisk until well combined.
Step 2: Let It Thicken
Allow the mixture to sit for about 5 minutes so it can thicken properly.
Step 3: Fold in Whipped Topping
Gently fold in the thawed whipped topping until everything is well mixed.
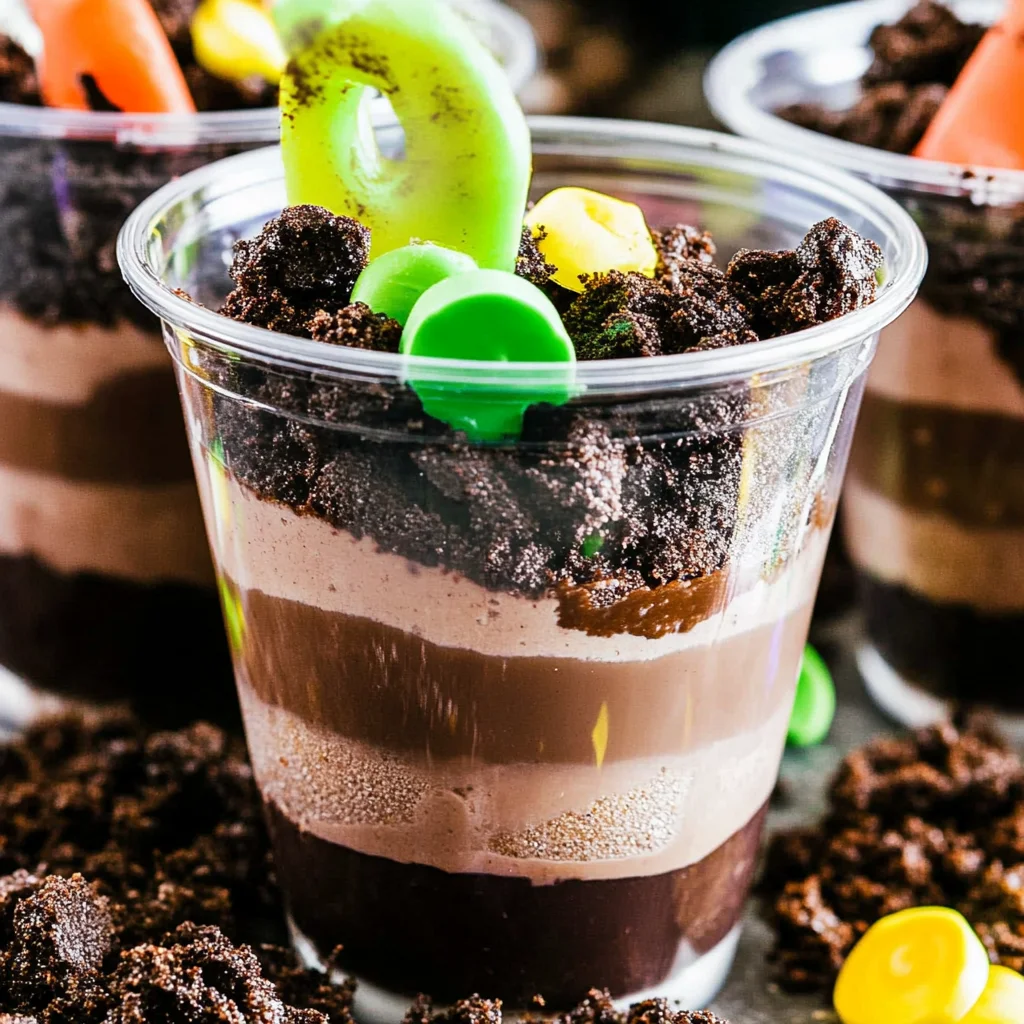
Step 4: Assemble the Cups
Spoon the pudding mixture into your serving glasses or cups.
Step 5: Add Crushed Oreos
Sprinkle crushed Oreo cookies on top of the pudding in each cup.
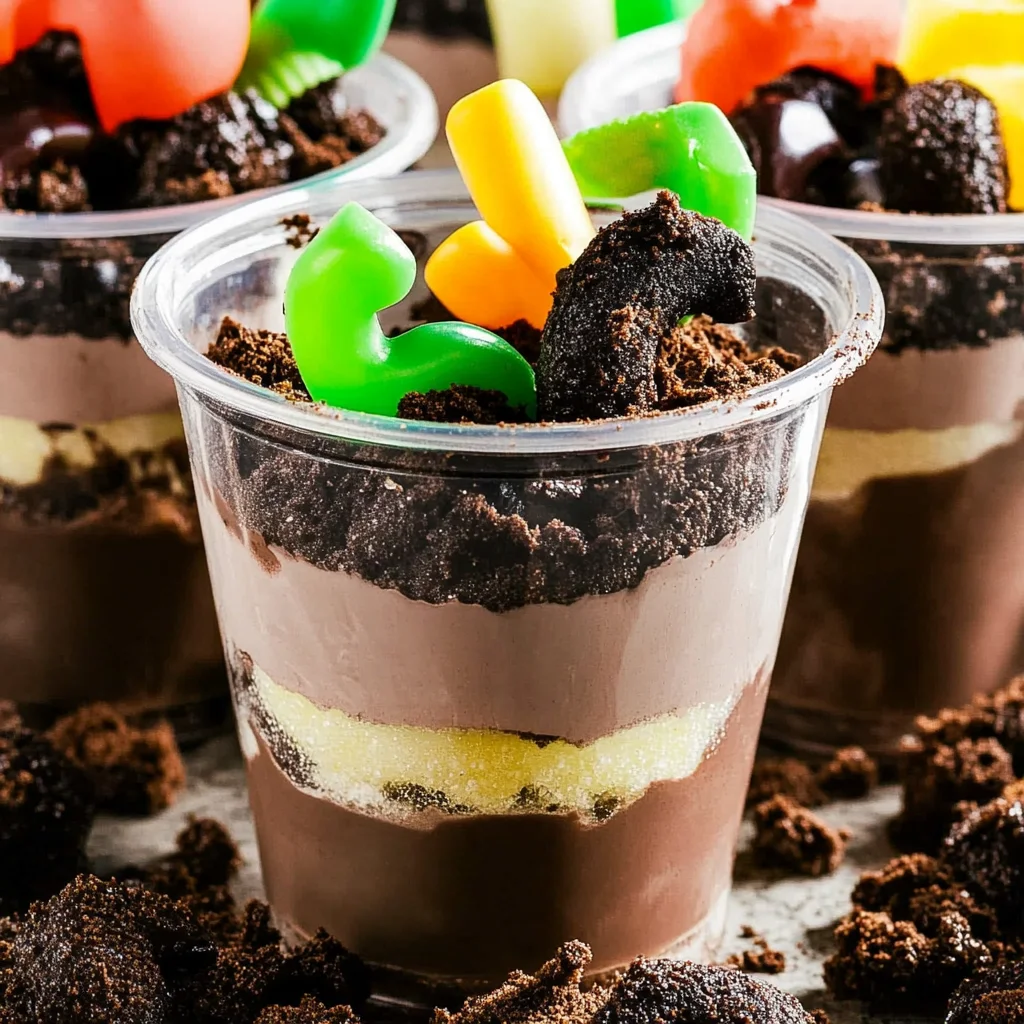
Step 6: Top with Gummy Worms
Place 4 gummy worms on top of each cup for that fun dirt look!
Step 7: Chill Before Serving
Chill the Dirt Cups until you’re ready to serve them. Enjoy!
How to Serve Dirt Cups
Dirt Cups are a fun and whimsical dessert perfect for parties or gatherings. Their playful appearance makes them a hit with both kids and adults. Here are some serving suggestions to elevate your Dirt Cups experience.
For Kids’ Parties
- Fun toppers: Add colorful sprinkles or mini chocolate candies for an extra pop of color.
- Themed cups: Use cups that match your party theme, like Halloween or birthday designs.
As a Dessert Table Feature
- Layered display: Arrange multiple cups on a tiered stand for a beautiful presentation.
- Labeling: Create cute signs labeling each cup, especially if you have different variations of Dirt Cups.
In Individual Servings
- Small jars: Serve in mason jars for a rustic touch that guests can take home.
- Mini sizes: Offer smaller portions in shot glasses for easy snacking during events.
With Customizable Toppings
- Variety of toppings: Set up a topping bar with crushed cookies, gummy worms, and other sweets so guests can build their own Dirt Cups.
- Seasonal toppings: Change toppings based on the season, like adding candy corn for Halloween.
How to Perfect Dirt Cups
Creating the ideal Dirt Cups involves attention to detail and creativity. Here are some tips to ensure your dessert is a hit.
- Chill before serving: Make sure to chill your Dirt Cups in the refrigerator for at least 30 minutes before serving. This helps them set properly.
- Use quality ingredients: Choose good-quality chocolate pudding and fresh whipped topping to enhance flavor.
- Layer wisely: Start with pudding as the base, then add Oreos and finish with gummy worms on top for visual appeal.
- Don’t overmix: When folding in whipped topping, do it gently to maintain the airy texture.
- Garnish creatively: Consider adding edible flowers or chocolate shavings on top for a gourmet touch.
Best Side Dishes for Dirt Cups
Dirt Cups are delightful on their own but can be complemented by some tasty side dishes. Here are several options that pair well with this fun dessert.
- Fruit Skewers: Colorful skewers filled with fresh fruits provide a refreshing contrast to the sweetness of Dirt Cups.
- Cheese Platter: A selection of cheeses adds savory flavors, balancing out the sweetness of your dessert.
- Veggie Sticks: Crunchy veggies like carrots and celery served with dip make for a healthy side option.
- Chocolate-Covered Pretzels: These sweet-salty treats offer a nice crunch alongside the creamy texture of Dirt Cups.
- Mini Cupcakes: Serve bite-sized cupcakes in various flavors for an additional sweet option that kids will love.
- Popcorn Bar: Provide different popcorn flavors such as caramel, cheese, and buttered popcorn for a fun snack mix-in option.
Common Mistakes to Avoid
Making Dirt Cups can be a fun and easy dessert, but there are common pitfalls to watch out for.
- Skipping the Thicking Step: Don’t rush this! Allowing the pudding to thicken for five minutes ensures the correct consistency.
- Overmixing the Whipped Topping: Gently fold in the whipped topping. Overmixing can deflate it and make your Dirt Cups less fluffy.
- Not Crushing Oreos Properly: Aim for a fine crumb. Large chunks won’t create the desired “dirt” effect on top of your cups.
- Using Warm Milk: Always use cold milk when making the pudding mix. Warm milk can lead to a lumpy texture.
- Ignoring Chill Time: Chill your Dirt Cups before serving. This enhances flavor and helps set the layers beautifully.
Storage & Reheating Instructions
Refrigerator Storage
- Store in airtight containers for up to 3 days.
- Keep separate layers if possible to maintain texture.
Freezing Dirt Cups
- You can freeze Dirt Cups, but they may lose some texture. Store in freezer-safe containers.
- They are best consumed within 1 month of freezing.
Reheating Dirt Cups
- Oven: Not recommended as it will alter the texture and flavor of the dessert.
- Microwave: Gently heat individual servings for about 10-15 seconds if desired. Be careful not to overheat.
- Stovetop: Not suitable for reheating; best enjoyed cold.
Frequently Asked Questions
What are Dirt Cups?
Dirt Cups are a fun dessert made from layers of chocolate pudding, crushed Oreos, and gummy worms, resembling dirt in a cup.
Can I customize my Dirt Cups?
Absolutely! You can add different candies or toppings like sprinkles or fruit to personalize your Dirt Cups further.
How long do Dirt Cups last?
When stored properly in the refrigerator, Dirt Cups can last up to 3 days.
Can I make Dirt Cups ahead of time?
Yes, you can prepare them a day in advance. Just keep them chilled until you’re ready to serve.
What is the best way to crush Oreos for Dirt Cups?
Use a food processor or place Oreos in a zip-top bag and crush them with a rolling pin for fine crumbs.
Final Thoughts
Dirt Cups are an irresistible dessert that appeals to both kids and adults alike. Their fun presentation and delightful flavors make them perfect for parties or cozy family nights. Feel free to customize your Dirt Cups with various toppings or flavors to suit your preferences. Give this recipe a try, and enjoy creating your own delicious version!
Dirt Cups

Dirt Cups are the ultimate whimsical dessert that combines layers of rich chocolate pudding, crushed Oreos, and playful gummy worms to create a treat that kids and adults adore. Perfect for birthdays, Halloween, or just as a fun family snack, these delightful cups promise to bring smiles with every spoonful. Easy to prepare and highly customizable, you can make them your own by adding various candies or toppings. Not only are they visually enticing, but they also offer a deliciously creamy and crunchy texture that makes each bite enjoyable. Gather your ingredients and get ready to impress your guests with this fun and nostalgic dessert!
- Prep Time: 15 minutes
- Cook Time: 0 minutes
- Total Time: 15 minutes
- Yield: Serves approximately 6 cups 1x
- Category: Dessert
- Method: No cooking involved
- Cuisine: American
Ingredients
- 3.4 ounces instant chocolate pudding mix
- 2 cups cold milk
- 8 ounces thawed whipped topping
- 10–12 Oreo cookies (crushed)
- 32 gummy worms
Instructions
- In a mixing bowl, add cold milk and sprinkle the pudding mix on top. Whisk until fully combined.
- Let the mixture sit for about 5 minutes to thicken.
- Gently fold in the thawed whipped topping until smooth.
- Spoon the pudding mixture into serving cups.
- Top each cup with crushed Oreos.
- Place gummy worms on top for decoration.
- Chill until ready to serve.
Nutrition
- Serving Size: 1 serving
- Calories: 370
- Sugar: 24g
- Sodium: 260mg
- Fat: 18g
- Saturated Fat: 10g
- Unsaturated Fat: 7g
- Trans Fat: 0g
- Carbohydrates: 49g
- Fiber: 1g
- Protein: 5g
- Cholesterol: 30mg


Leave a Comment